When our darling doggies are having trouble with their nails it’s time to make sure that something is done. There’s more than one way to take care of the problem and depending on your dog’s temperament and your fortitude you’ll have to find a way that works for both of you.
So, let’s hop right into four great ways to trim a dog’s nails.
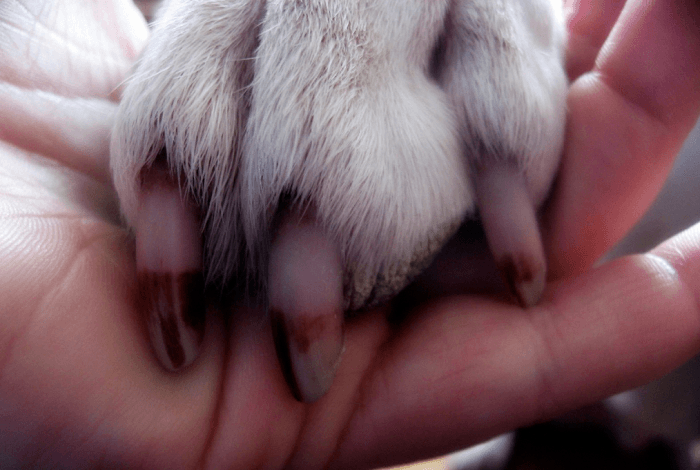
Do not trim over the quick
1. Standard Cutters
Dog nail trimmers are an investment. The best can be rather expensive but you don’t want to cheap out. Our pet’s nails are tough and you want to be able to make the trim quickly and easily.
It is also essential to know when to trim your dog’s nails. Usually when they are too long and make a clicking sound on the ground or you understand that they are too long to break down or put the dog into trouble. It is advisable to know the seriousness of the situation and go about a manner that would not put the pet in a fix.
The best are made of stainless steel and have a powerful springs. You should also be able to fit them easily in your hand, making an ergonomic grip a big concern for the majority of people.
Desensitizing your dog may be necessary. There are many nerve endings in a dog’s paws and most don’t like their feet being touched. You can assist yourself along the way by incorporating stroking your dog’s paws into your petting routine until they’re comfortable with them.
The other important thing to understand is your dog’s stress threshold. Not every dog is going to be able to sit through all of their nails being cut in a single session. Particularly nervous dogs may need to only have one or two clipped while they sit with you. So it is essential to first know how to trim your dog’s toenails and then you can have a go.
Desensitization will make things less stressful for both of you.
Once you have your dog’s nail clippers and a good understanding of them you’ll also need to understand how canine nails work.
These come in two varieties: guillotine-style and scissors. Scissor-style cutters are easier to use for the most part, but guillotine-style cutters are often better for accurate and decisive cuts.
Understanding a Dog’s Nails
A dog’s nails aren’t like a human’s. The “quick” of our nails is entirely at the bottom. You can trim your nails without needing to worry about anything since there’s no blood flow over the majority of the nail.
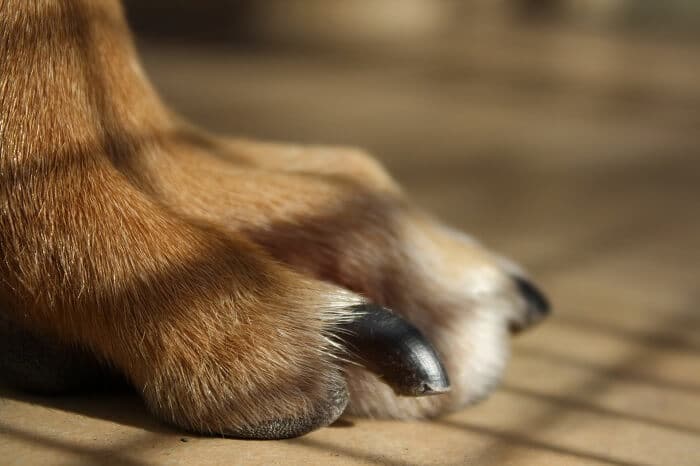
On the other hand, a dog’s nail has a longer quick which reaches through the nail itself. When a dog has light-colored nails it can actually be seen: the pinkish tone which extends past the base of the nail is actually a blood-vessel-rich area.
Cutting into the quick is going to result in pain and bleeding. While it’s not going to put your dog in danger of bleeding out, it will definitely bleed enough that most people will end up worried.
For that reason, it’s important to have styptic powder on hand. These powders cause blood to clot almost instantly, sealing the wound and preventing it from bleeding. Some people use corn starch if the powder isn’t available, it doesn’t work quite as well but it’ll do the trick.
Make sure to have it on hand during any trimming session, with any tool. Just take a small portion and put it in a bottle cap or other small container and keep a wetted cotton swab nearby, if you do make a mistake then quickly roll the swab in the powder and apply it directly to the nail.
This simple procedure can save a lot of stress for the would-be clipper.
Immobilizing Your Dog
When you’re using standard clippers you’ll want to make sure your dog doesn’t move. Smaller dogs can be held in the lap and you can lean across the foreleg with your elbow to keep them from moving while you’re making the cut.
For larger dogs, it’s often best to get them to lay on a table, raised dog bed, or another surface that will let them fully lie down. Use your upper body to hold the dog in place gently as you reach across to trim nails on the other side, using one arm to also keep the leg immobile.
If your dog is particularly wiggly during the process then you may need to roll them onto their side when cutting. Too much movement makes the whole process more stressful for both of you.
The Cutting Process
For the most part, you’re going to want to trim slowly but surely.
This is why using a great pair of nail shears is so important. A bad one may require more than one cut and the whole operation is sensitive from the outset, meaning you may end up with some problems. A nail that is only partially cut increases the stress on your dog.
If your dog has light-colored nails you’re in luck.
You’ll want to reduce the nail bit-by-bit, especially if your dog’s nails are particularly long. Make decisive cuts as you go, ensuring that you’re able to make each one with only one pull of the handle.
As a general rule of thumb, you’ll be safe as long as you’re cutting where the dog’s nail begins a sharp downward hook. Not all dog nails have this hook, however, so it’s best to stay at least ¼” off the quick.
If anything feels “spongy” as you go through the nail then you’ve hit the quick. Let off the pressure immediately and grab the swab, you’re going to have a mess on your hands.
Light nails make the task much easier since you can see the quick, but dark nails require some more consideration. For the most part, you’ll only want to remove around 1/16” at a time.
After each cut, take a look at the end of the nail. If it’s still whitish then you’re in the “safe zone” and can make another snip. If the nail is black all the way across then you’re finished with the nail.
You don’t need to do them all at once. If your dog becomes too difficult or begins to seem overly stressed let them up and come back to it another day.
Make sure you give your dog a treat afterward as well if they’re well-behaved. Associating grooming behavior with treats is an excellent way to make your dog more compliant in the future.
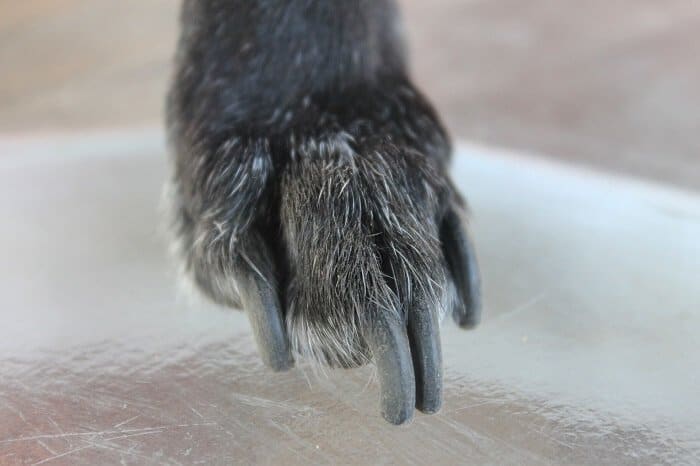
It is time to clipping
After clipping
2. Dog Nail Grinders
Nail grinders are a great way to handle nails… as long as your dog can take the noise and vibration.
Most of these resemble a small rotary Dremel with a sanding drum. A good nail grinder should be lightweight, ergonomic, and battery-powered. The best will also have minimal vibration in the handle.
Follow the same basic guidelines as you would with cutters. Immobilizing the dog, getting them familiar with the tool, and the same guidelines for not hitting the quick all apply here.
Grinding is much closer to filing than actually trimming the nails. You want to sand them back to about the same place you’d trim them to, which is just above the hook. For clear or white nails it’s still easy to see, but you’ll want to take extra care with black nails.
You may want to keep a second cotton swab around, in addition to the one for the styptic powder, which you can wet and use to wipe the dust off the end of the nails. This will help you determine if you want to go further during the trimming process.
You may want to do this outside if possible. If not a dust mask may be a good idea, especially if you’ve been lagging for a good bit on getting their nails trimmed. It’s a rather dusty process after all.
Is a Grinder the Right Choice?
Grinders aren’t always a viable option.
Skittish dogs will find them downright terrifying and unlike standard clippers, the process isn’t over in a moment.
Calmer dogs will find them to be a great option and they’re often much easier for the human operator.

3. Use a Groomer or Veterinarian
For those who are extremely unsure of themselves, it’s a good idea to head down to a local groomer or veterinarian.
While it’s more expensive than cutting your dog’s nails at home, a vet or groomer understands how to avoid cutting to the quick of the nail and will usually save you from any problems that might arise.
After all, cutting your dog’s nails requires that you be careful and don’t cut too far. If you do then you’ll need styptic powder to clot the bleeding and your canine isn’t likely to be too happy with you.
So, if you have a particularly difficult dog or you’re too nervous to do it yourself then a professional is an option we can all agree on.
No More Clacking Nails
Your dog’s nails are a vital part of their health and trimming them is just part of the grooming process. Fortunately, you have multiple options available when it comes time to make sure that they’re not clicking on the floor.
Remember, if you’re squeamish about doing it yourself you can always go down the professional route. It’s not necessarily something you have to handle yourself.
Still, it can be vital bonding time with your pet so why not give it a shot? All you need to do is pick up a great set of clippers or a solid grinder and you’re ready to save some money and get your dog’s nails nice and trimmed.

